
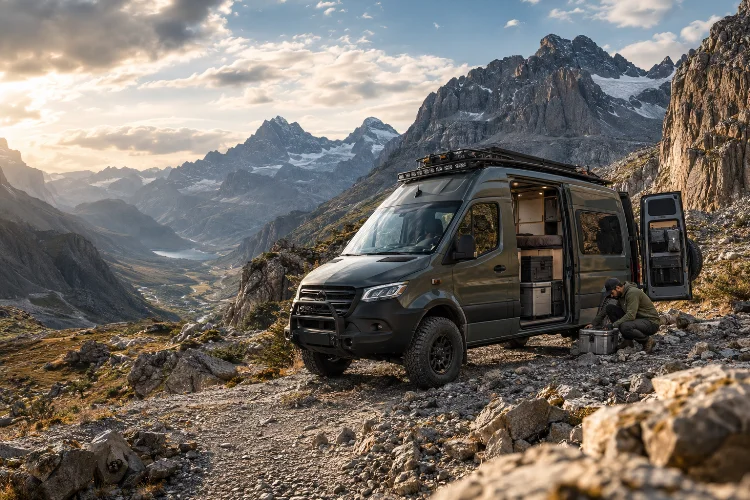
Imagine driving your adventure van through a rocky mountain pass, hundreds of miles from the nearest mechanic. The suspension is working overtime, the engine is climbing hard, and every unnecessary kilogram suddenly feels like a bad decision.
That’s the reality of serious overland travel. A van that looks incredible in a parking lot isn’t automatically ready for endless gravel roads, steep climbs, muddy tracks, and weeks without reliable services.
Designing lightweight van conversions for heavy-duty expeditions is about finding the sweet spot between durability, comfort, and vehicle performance.
You want enough equipment to survive challenging conditions without turning your camper into an overloaded moving apartment.
The good news? Lightweight doesn’t have to mean fragile, uncomfortable, or ridiculously expensive.
With smarter materials, balanced weight distribution, modular furniture, and efficient off-grid systems, you can create an expedition-ready vehicle that handles demanding routes without sacrificing everyday comfort.
This guide explores the engineering decisions, practical compromises, and construction strategies that make a lightweight adventure van genuinely capable of going the distance.
1. Start With a Realistic Weight Budget
Understand your van’s actual payload capacity
Before buying plywood, batteries, or fancy off-road accessories, you need to know how much weight your vehicle can safely carry. This might sound boring compared with designing a beautiful interior, but it determines almost everything that follows.
Every vehicle has a Gross Vehicle Weight Rating (GVWR), which represents its maximum manufacturer-rated loaded weight. There are also Gross Axle Weight Ratings (GAWR), limiting how much each axle can carry.
Here’s a simple example.
Suppose your van has a GVWR of 3,500 kilograms and weighs 2,500 kilograms with fuel but before conversion work. That leaves 1,000 kilograms for the entire build, passengers, water, food, tools, and expedition gear.
Now imagine two travelers weighing 150 kilograms combined, 80 kilograms of water, and another 220 kilograms of supplies and recovery equipment. Suddenly, only 550 kilograms remain for the conversion itself, before allowing any additional safety margin.
This is why a lightweight build requires serious planning rather than guesswork.
Create a weight allowance for every system
Divide your conversion into categories such as furniture, insulation, flooring, electrical equipment, plumbing, and external accessories. Assign each category a target weight before construction begins.
A cabinet might seem insignificant at 15 kilograms, but six cabinets can add another 90 kilograms. Combine that with heavy countertops, oversized battery banks, and a roof rack, and your payload disappears surprisingly quickly.
Leave some unused capacity for unexpected equipment and changing travel needs. Most importantly, verify the completed vehicle on a scale, including separate front and rear axle measurements.
As explained in FarOutRide’s vehicle weight guide, weight management directly affects safety, handling, and the durability of major vehicle components.
2. Choose Lightweight Materials That Can Handle Abuse
Replace unnecessary bulk with smarter construction
Traditional camper conversions often rely on thick plywood, hardwood countertops, and bulky timber frames. These materials are familiar and relatively easy to work with, but they’re not always the most efficient choice for a demanding expedition.
Poplar plywood, aluminum extrusion, and engineered composite panels can reduce weight significantly when used in appropriate applications. The important thing is choosing materials based on their actual function instead of assuming one material should do everything.
For example, a wall panel doesn’t need the same strength or thickness as a bed platform supporting two adults.
According to a van conversion material weight comparison, typical 12 mm poplar plywood weighs around 5.4 kg per square meter, while birch plywood weighs approximately 8.4 kg.
Across eight square meters of paneling, switching from birch to poplar could save roughly 24 kilograms, although actual weights depend on the product.
Consider aluminum framing and composite panels
Aluminum T-slot extrusion offers a modular alternative to conventional wooden cabinet frames. It allows builders to create adjustable structures without relying on thick, fully enclosed plywood boxes.
However, aluminum isn’t automatically lighter in every configuration. Overbuilt profiles, steel connectors, and excessive brackets can quickly cancel out the savings.
Composite sandwich panels are another interesting option for selected doors, partitions, and interior surfaces. Their lightweight core and rigid outer skins can offer useful stiffness without excessive mass.
Still, don’t assume every panel can support concentrated loads or hold screws directly. Structural performance depends on the panel specifications, edge reinforcement, mounting details, and the intended load.
Don’t sacrifice durability just to save kilograms
Heavy-duty expeditions involve vibration, temperature changes, dust, and moisture. Lightweight materials must withstand that enviroment without cracking, loosening, or deteriorating prematurely.
Use moisture-resistant finishes, protect exposed plywood edges, and reinforce high-stress joints. A slightly heavier component that survives years of rough travel is better than an ultralight version that needs replacing after the first expedition.
3. Design a Compact Layout That Works on Rough Terrain
Make every centimeter serve a purpose
The best lightweight adventure van layout isn’t necessarily the one with the most features. It’s the one that provides everything you genuinely need without filling every available corner.
Start by considering your daily routine. Where will you sleep, cook, change clothes, access tools, and store wet outdoor equipment?
For extended overlanding, a fixed rear bed with storage underneath can be especially useful. It eliminates the daily hassle of converting seats into a sleeping area and creates a dedicated compartment for expedition gear.
However, a fixed bed isn’t always ideal for shorter vehicles. Convertible sleeping platforms and removable benches may offer better flexibility when interior length is limited.
Use modular furniture instead of permanent bulk
Modular camper interiors make it easier to adapt the vehicle for different trips. Removable storage boxes, folding countertops, and adjustable shelving allow you to change the setup without rebuilding everything.
For example, a removable rear cargo module could hold camping equipment during a desert expedition. Later, you might replace it with bicycle storage or a compact mobile workstation.
The key is designing a secure attachment system from the beginning. Furniture should never be free to shift during hard braking or rough-road driving.
Keep heavy equipment in the right locations
Layout design also influences vehicle stability.
Batteries, water tanks, spare parts, and recovery equipment should generally be installed low and distributed appropriately around the axle area. Avoid placing too much weight high on the roof or hanging excessive loads far behind the rear axle.
Low-mounted equipment helps limit unnecessary increases in the center of gravity. But always check actual axle loads rather than assuming a visually balanced layout is mechanically balanced.
4. Engineer the Interior for Vibration and Structural Reliability
Understand why rough roads destroy weak cabinetry
A camper conversion that survives city driving might develop serious problems after hundreds of kilometers of corrugated dirt roads. Constant vibration puts repeated stress on joints, fasteners, brackets, and equipment mounts.
Over time, screws can loosen, cabinet panels can crack, and poorly supported plumbing connections may begin leaking.
That’s why expedition van construction requires more than simply making furniture sturdy enough to stand on.
Cabinets and heavy accessories must remain secure during emergency braking, cornering, and prolonged vibration. Mounting loads should be transferred into appropriate vehicle attachment points or properly engineered reinforcements.
Design connections that remain serviceable
Bolted connections, suitable threaded inserts, structural brackets, and vehicle-approved mounting systems can make repairs more manageable.
For wood assemblies, use appropriate joinery and reinforcement rather than depending entirely on screws driven into panel edges. For aluminum extrusion, select connectors according to the expected loads and inspect them periodically.
Avoid drilling through unknown structural members, wiring routes, or safety-critical vehicle components. When modifications affect the body structure or passenger restraint systems, consult a qualified vehicle engineer or conversion specialist.
Build for field repairs
Remote travel changes how you should approach maintanance.
Imagine discovering a leaking water fitting or damaged electrical connector after two days on a rocky trail. If reaching that component requires dismantling your entire kitchen, a small repair becomes a major problem.
Provide removable inspection panels, accessible fuse locations, visible plumbing joints, and a sensible route for replacing damaged cables.
This approach adds very little weight but delivers enormous practical value when something goes wrong.
5. Build Efficient Off-Grid Systems Without Overloading the Van
Right-size the electrical system
A huge battery bank looks impressive on a conversion specification sheet, but unused electrical capacity is simply additional weight.
Start by calculating how much energy your equipment consumes each day.
For example, suppose your compressor fridge uses 450 watt-hours daily, lighting and ventilation consume another 120 Wh, and laptops plus communication devices require 230 Wh. Your estimated daily demand is approximately 800 Wh.
A nominal 12.8-volt, 200-amp-hour lithium battery stores about 2,560 Wh. Actual usable energy will be lower after operating limits, conversion losses, and reserve allowances are considered.
Rather than automatically adding more batteries, evaluate your expected charging opportunities and how many days you need to remain stationary.
Solar panels, compatible alternator charging through a DC-DC charger, and occasional shore power can complement each other. The Victron Energy solar sizing guide explains why daily energy consumption and realistic sunlight conditions should drive these decisions.
Choose water capacity based on real consumption
Water is one of the heaviest consumables in an expedition vehicle.
Every liter adds approximately one kilogram, excluding the tank, fittings, and mounting hardware. An 80-liter freshwater supply therefore adds around 80 kilograms when full.
Rather than installing the largest possible tank, calculate your daily requirements for drinking, cooking, cleaning, and washing.
If two travelers consume 16 liters daily, an 80-liter tank theoretically provides five days of water. Allowing a reasonable reserve reduces the planned supply period to around four days.
Keep water tanks securely mounted, ideally low within the vehicle, and protect them from freezing conditions when necessary. Include accessible drain points, proper filtration, and arrangements for collecting and disposing of wastewater responsibly.
Simplify heating, cooking, and ventilation
Lightweight off-grid living also means questioning unnecessary appliances.
A compact galley, efficient compressor refrigerator, practical insulation, and powered roof ventilation often provide more everyday value than an oversized kitchen.
For cold-weather expeditions, choose an appropriately rated, professionally installed heater that vents combustion gases outside. Never operate portable camping stoves, charcoal grills, or generators inside the van.
Carbon monoxide detectors, proper ventilation, and correct electrical circuit protection are essential safety considerations, regardless of how minimalist your build becomes.
6. Protect Off-Road Capability Without Adding Excessive Accessories
Be selective about exterior upgrades
It’s easy to get carried away with steel bumpers, large roof racks, oversized tires, side ladders, spare-wheel carriers, and elaborate exterior storage systems.
Some upgrades may be genuinely useful, but every modification carries a weight penalty. A heavily equipped van can lose the payload advantage gained through careful interior engineering.
Ask whether each accessory solves a problem you’re likely to encounter. Recovery points, suitable tires, and correctly positioned underbody protection may be more valuable than cosmetic expedition styling.
Avoid assuming a suspension lift increases vehicle payload or axle ratings. Those limits remain governed by the vehicle and approved component specifications.
Balance protection with ground clearance
Off-road protection should focus on vulnerable components such as exposed plumbing, electrical equipment, and suitable underbody locations.
A poorly placed wastewater tank or low-hanging storage box may reduce clearance and become an expensive liability on rocky trails.
Similarly, a massive roof platform can add weight high above the vehicle’s center of gravity. That affects handling, particularly on uneven or sloping terrain.
Choose accessories with actual travel conditions in mind rather than copying every feature from a heavily modified expedition truck.
Remember that tires and suspension are part of the system
The right tires can make a tremendous difference on gravel, mud, and rocky tracks.
However, tire load ratings, wheel compatibility, inflation pressure, and vehicle manufacturer requirements all matter. Tire pressure adjustments for off-road conditions should follow appropriate guidance, with reinflation before returning to normal road speeds.
The goal isn’t to build an indestructible machine. It’s to create a capable vehicle that maintains predictable handling, useful payload, and long-term mechanical reliability.
7. Test the Conversion Before Taking It Into Remote Territory
Build a prototype before final installation
One of the most pratical ways to avoid expensive mistakes is to test your layout before committing to permanent construction.
Cardboard templates, temporary plywood platforms, and taped floor markings can reveal problems that look invisible in digital design software.
Try moving between the bed, kitchen, and cab while someone else is standing in the aisle. Check whether drawers can open fully and whether emergency equipment remains accessible when storage compartments are packed.
These small experiments can prevent frustrating design compromises later.
Weigh the vehicle under realistic conditions
After construction, load the van as though you’re departing on a proper expedition.
Include passengers, fuel, water, food, spare parts, outdoor equipment, and recovery gear. Measure total weight and individual axle loads, then compare the results with the manufacturer’s ratings.
Remember to check tires and wheels seperately for their approved load capacities.
If the vehicle is overweight, identify the heaviest systems before removing useful safety equipment. Reducing excessive furniture, decorative finishes, and redundant accessories may achieve better results.
Take a proper shakedown trip
A few nights near home can expose uncomfortable sleeping arrangements, loose hardware, poor airflow, and inconvenient storage locations.
Then progress to a longer trip involving gravel roads, changing weather, and realistic off-grid operation.
Pay attention to rattles, cabinet movement, charging performance, water consumption, and suspension behavior. Inspect attachment points and plumbing connections after rough-road sections.
Document what works and what doesn’t. A thoughtful expedition vehicle is rarely perfected in one attempt, and modular construction makes those future improvements much easier.
Designing a capable expedition camper isn’t about removing every comfort or buying the lightest components available. It’s about making smarter engineering decisions that balance useful payload, structural durability, vehicle handling, and long-term livability.
Lightweight panels, modular furniture, carefully positioned equipment, and efficient off-grid systems can make a remarkable difference to how a van performs during extended journeys.
Just remember that real capability comes from proper mounting, weight verification, reliable components, and thorough testing.
Before starting your conversion, create a realistic weight budget, sketch your ideal layout, and question every unnecessary addition.
Build for the difficult roads, unexpected delays, and everyday routines you’ll actually experience. With the right approach, your adventure van can travel farther, remain easier to maintain, and deliver genuine freedom without carrying more than it needs.
