
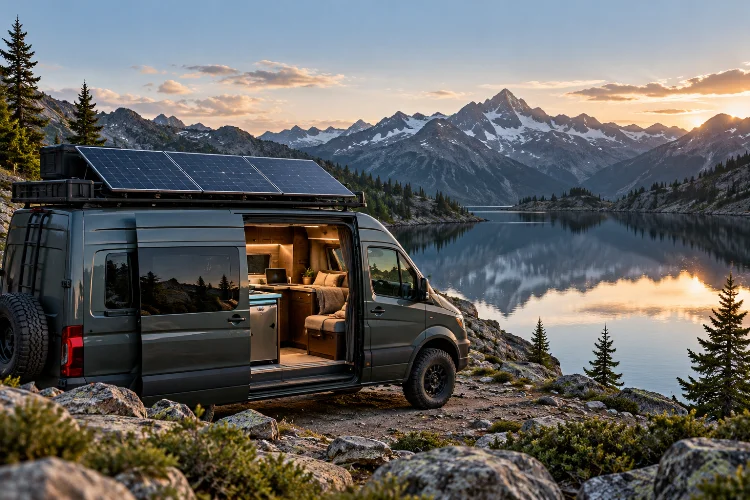
Imagine parking your adventure van beside a quiet mountain lake, miles away from the nearest campsite or electrical hookup.
Your refrigerator is keeping food fresh, your laptop is charging, and the lights are ready for another cosy evening. The best part? You’re generating your own electricity directly from the sun.
That’s exactly why solar power has become such an important feature in modern campervan conversions.
However, designing high-output solar arrays for off-grid adventure vans involves more than covering the roof with as many panels as possible. A reliable system needs the right combination of solar capacity, battery storage, charge controllers, wiring, and intelligent energy management.
Get the balance wrong, and even an expensive installation might struggle to keep up with everyday electrical demands.
Get it right, and you can spend longer exploring remote destinations without constantly worrying about your battery percentage.
Whether you’re planning a weekend escape or preparing for months of independent travel, understanding how to engineer an efficient campervan solar system can make a huge difference.
Let’s explore the practical design decisions that turn a basic rooftop installation into a dependable off-grid energy solution.
1. Calculate Your Adventure Van’s Real Energy Requirements
Before choosing solar panels, you need to understand how much electricity your campervan actually consumes.
This is probably the least exciting part of designing an electrical system, but it’s also one of the most important. Without a realistic energy budget, you could end up purchasing equipment that’s either too small for your lifestyle or unnecessarily expensive.
Start With a Daily Power Consumption Audit
Every electrical appliance inside your van uses energy, measured in watt-hours (Wh).
The calculation is straightforward:
Daily Energy Consumption (Wh) = Power (W) × Operating Hours
For example, imagine your campervan refrigerator consumes 45 watts while its compressor is running. If the compressor operates for approximately ten hours across a full day, the refrigerator uses around 450 Wh.
Now add your other devices.
A ventilation fan might consume 180 Wh per day, while a laptop uses another 260 Wh. Lighting, phone charging, water pumps, and smaller appliances could add approximately 410 Wh.
Your total daily energy requirement would be around 1,300 Wh, or 1.3 kilowatt-hours (kWh).
This example is only a planning estimate. Actual consumption depends on appliance efficiency, temperature, operating habits, and the equipment installed.
Account for Occasional High-Power Appliances
Some devices consume relatively little electricity over a day, while others demand substantial power over short periods.
An induction cooktop, microwave, electric kettle, or portable air conditioner can quickly increase your energy requirements.
For instance, an 800-watt appliance running for two hours consumes 1,600 Wh. That’s already more than the entire daily energy budget in our earlier example.
High-powered equipment also affects inverter sizing and battery discharge requirements, even when its daily operating time is limited.
This is why a thoughtful energy audit should consider both total daily consumption and the maximum power your system must deliver at once.
2. Choose the Right Solar Array Capacity for Your Travel Style
Once you’ve estimated your daily electricity usage, the next step is determining how much photovoltaic capacity your van needs.
Solar panels are rated according to their output under standard test conditions. Unfortunately, real-world camping conditions rarely match those laboratory measurements.
Cloud cover, roof orientation, shadows, heat, dirt, and seasonal sunlight all influence actual energy production.
Understand Peak Sun Hours
Peak sun hours represent an equivalent number of hours when solar irradiance averages 1,000 watts per square metre.
They aren’t simply the number of daylight hours. A location might experience twelve hours of daylight but receive the equivalent of only four peak sun hours.
For a rough planning estimate, you can use:
Daily Solar Energy (Wh) = Solar Array Wattage × Peak Sun Hours × System Efficiency Factor
Imagine installing a 600-watt rooftop array in a location averaging four peak sun hours.
Using a simplified efficiency factor of 0.75 to allow for combined production and conversion losses, the estimated daily harvest becomes:
600 W × 4 hours × 0.75 = 1,800 Wh per day
That’s potentially enough to replace the 1,300 Wh consumed in our example, with some additional capacity available under favourable conditions.
However, this calculation isn’t a production guarantee. Real results can vary significantly, particularly when the van is parked beneath trees or frequently travels through cloudy regions.
Plan for Seasonal and Weather Variations
A solar installation that performs beautifully during summer might struggle during shorter winter days.
Lower solar angles, persistent cloud cover, and changing parking locations can reduce available charging energy.
Tools such as the National Laboratory of the Rockies’ PVWatts Calculator can help estimate location-specific solar generation. Keep in mind that PVWatts primarily models stationary photovoltaic installations, so its results require careful interpretation for a moving campervan.
For extended travel, consider a reasonable generation buffer and alternative charging methods rather than relying exclusively on ideal sunshine.
You should also remeber that adding more panels isn’t always possible. Roof space, vehicle payload, mounting restrictions, and electrical component ratings ultimately determine how much capacity you can install safely.
3. Select Solar Panels That Match Your Campervan Roof Design
Solar panel selection isn’t just about finding the highest wattage advertised online.
An adventure van has a limited rooftop area, and that space may already contain roof vents, air-conditioning units, antennas, skylights, or storage accessories.
Your design needs to maximise useful energy generation without compromising the vehicle’s other functions.
Rigid vs Flexible Solar Panels
Rigid monocrystalline panels are a popular choice for permanent campervan solar installations.
They typically use an aluminium frame with protective glass and can provide excellent durability when installed with appropriate mounting hardware. Properly designed mounts also create airflow beneath the modules, helping reduce excessive heat buildup.
Flexible solar panels provide a different set of advantages.
Their lightweight construction and ability to follow gently curved surfaces can make them attractive for vans with unusual roof profiles. They’re also useful when overall height and mass are important design considerations.
However, flexible panels can experience greater heat buildup when mounted directly against a surface, and their service life depends heavily on construction quality and installation conditions.
Neither option is automatically the best choice. Consider panel efficiency, weight, dimensions, mounting requirements, ventilation, and the manufacturer’s durability specifications.
Make Every Square Centimetre Count
Before ordering equipment, measure your roof carefully.
Identify usable mounting areas, structural attachment points, and the clearance needed around vents or other rooftop equipment.
For example, four compact 150-watt panels might fit around roof accessories more effectively than two oversized 300-watt modules.
Alternatively, larger panels may produce a cleaner installation with fewer connections when sufficient uninterrupted space exists.
Create a simple roof layout before purchasing anything. Even a basic scale drawing can reveal conflicts that aren’t obvious when looking at the van from ground level.
Don’t forget the total rooftop load rating, including mounting brackets, crossbars, cables, and accessories. A solar system should improve your travelling independence without creating an unsafe vehicle configuration.
4. Design an Efficient Solar Wiring and MPPT Charging System
The way solar panels connect to one another can significantly influence how your system performs.
Two common configurations are series wiring and parallel wiring. Both can work well, but they behave differently under varying sunlight conditions.
Series vs Parallel Solar Panel Connections
When solar panels are connected in series, their voltages add together while the current remains approximately the same as a single module.
Suppose two identical 200-watt panels each operate at 20 volts and 10 amps at maximum power.
Connecting them in series creates a nominal maximum-power operating point of approximately 40 volts and 10 amps.
Parallel wiring keeps the voltage around 20 volts while increasing the combined current to approximately 20 amps.
The total rated power remains 400 watts in either arrangement.
Series configurations can reduce cable current and resistive losses, making them useful for some installations. However, partial shading on one panel can affect the entire string.
Parallel arrangements generally handle uneven panel illumination more independently, although their higher combined current may require larger cables and appropriately rated protection.
Series-parallel combinations offer another option for larger rooftop arrays.
Why MPPT Charge Controllers Matter
A Maximum Power Point Tracking (MPPT) charge controller adjusts its operating point to extract available power from the panels and convert it into suitable battery-charging output.
Unlike simpler PWM controllers, MPPT devices can efficiently use solar arrays operating at substantially higher voltages than the battery bank, within the controller’s specifications.
For a 600-watt array charging a 12-volt battery system at approximately 14.4 volts, the theoretical maximum charging current would be around 42 amps before practical limitations.
A controller with a suitable rating, potentially in the 50-amp class, might therefore be considered.
However, its actual suitability depends on the manufacturer’s permitted PV wattage, input voltage, short-circuit current, charging limits, and operating temperatures.
Importantly, panel open-circuit voltage rises in cold weather. Your series string must remain below the controller’s absolute voltage limit under the coldest expected conditions.
Choosing a controller based solely on the number of panels is one of the easiest ways to create an underperforming or unsafe installation.
5. Match Battery Storage to Your Solar Power Generation
Solar panels generate electricity when sunlight is available, but your adventure van still needs energy after sunset.
That’s where the battery bank becomes essential.
A well-designed off-grid system balances daytime generation with enough stored energy for overnight use and periods of poor weather.
Why LiFePO4 Batteries Are Popular
Lithium iron phosphate (LiFePO4) batteries have become a common choice for modern campervan conversions.
They offer high usable capacity, relatively low weight compared with equivalent lead-acid storage, and strong cycle-life performance when operated within their specifications.
They also work well with appropriately configured solar charge controllers.
However, LiFePO4 batteries aren’t a universal drop-in solution. They require compatible charging settings, suitable protective devices, and a battery management system (BMS).
Cold-weather charging deserves special consideration because many lithium batteries restrict charging at low cell temperatures. Some models include integrated heating to enable charging safely in colder enviroments.
Calculate the Storage Capacity You Actually Need
Let’s return to our example of a van consuming 1,300 Wh each day.
If you want approximately two days of operation without meaningful charging, your electrical equipment requires around 2,600 Wh of usable stored energy.
A 12.8-volt, 300-amp-hour LiFePO4 battery bank has a nominal capacity of:
12.8 V × 300 Ah = 3,840 Wh
This provides a useful reserve above the two-day consumption estimate, although the actual available energy depends on battery operating limits, temperature, losses, and the reserve you choose to maintain.
Larger battery banks can extend your off-grid endurance, but they also increase cost, weight, and installation complexity.
Consider a 24V Electrical Architecture
Most smaller campervans use 12-volt electrical systems because many accessories are designed for that voltage.
However, higher-output installations may benefit from 24-volt battery architecture.
For the same power transfer, doubling the voltage approximately halves the current, reducing some cable-sizing and voltage-drop challenges.
A 24-volt system may be especially attractive when operating larger inverters or substantial charging equipment.
The trade-off is that existing 12-volt appliances require compatible conversion equipment, and every charger, inverter, and protective component must be selected for the system architecture.
6. Prioritise Safe Mounting, Wiring, and Electrical Protection
A powerful solar array won’t be very helpful if its installation creates water leaks, electrical faults, or equipment failures.
Adventure vans encounter vibration, rain, heat, dust, and frequent movement. Their electrical systems need to tolerate conditions that are very different from those of a stationary building.
Secure Roof Panels for Real-World Driving
Solar panel mounts must withstand aerodynamic forces, vibration, and the vehicle’s operating conditions.
Use mounting systems that are suitable for the panel and vehicle roof, following manufacturer instructions for fasteners, adhesives, attachment points, and load ratings.
When roof penetrations are necessary, apply appropriate sealing methods to prevent water ingress.
Allow suitable clearance for ventilation and maintain access for inspection and cleaning.
Avoid assuming that a bracket designed for a stationary installation is automatically suitable for use on a moving vehicle.
Use Properly Sized Cables and Protective Devices
Cable selection is about more than carrying enough current under normal conditions.
Conductors must also withstand expected temperatures, voltage drops, mechanical movement, and potential fault conditions.
Undersized wiring can waste energy through electrical resistance and may create overheating risks.
Victron Energy’s Wiring Unlimited guidance explains why cable selection should consider current, cable length, system voltage, insulation, and suitable protective devices.
Battery circuits need appropriately rated overcurrent protection positioned to protect the wiring, while PV circuits may require additional string protection and isolation depending on their configuration.
Use components rated for the maximum applicable DC voltage and fault current. Solar connectors should also be approved for use together rather than assumed compatible simply because they look alike.
Keep Maintenance and Emergency Access Practical
Design the system so that key electrical components remain accessible.
A concealed controller might create a cleaner-looking interior, but it can make troubleshooting difficult when something goes wrong.
Provide the ventilation clearances specified by each equipment manufacturer and keep electrical components away from unnecessary moisture exposure.
Clearly labelled isolation points, properly installed cable protection, and secure component mounting improve long-term maintenence and safety.
For complex installations, professional design review and commissioning by a qualified mobile electrical specialist are worthwhile investments.
7. Maximise Solar Performance Through Smart Energy Management
Even a technically excellent installation won’t deliver ideal results every day.
Fortunately, several practical habits can help you extract more useful energy from your campervan solar system.
Reduce Shading and Manage Heat
Small rooftop shadows can have a surprisingly large effect on photovoltaic output.
Roof racks, vents, antennas, and nearby trees may shade individual cells or sections of a module.
Whenever possible, position panels to minimise shading from permanent rooftop accessories.
Heat also affects performance. Most conventional photovoltaic modules produce less electrical power as their cell temperature rises, even when sunlight remains strong.
Maintaining manufacturer-recommended airflow beneath suitable rigid panels can help manage operating temperatures.
Portable solar panels can supplement a fixed array when you want to park the van in the shade while positioning additional modules in sunlight.
Just ensure the supplementary panels remain electrically compatible with their charging equipment.
Monitor Actual Solar Production
A battery monitor and an MPPT controller with performance monitoring can make troubleshooting much easier.
Track daily energy generation, battery state of charge, charging current, and your overnight consumption.
If your 600-watt array consistently generates less energy than expected, investigate shading, temperature, wiring losses, controller settings, and environmental conditions.
Compare results over several days instead of judging the installation by a single cloudy afternoon.
This data can reveal whether you need more solar capacity, additional battery storage, or simply better energy habits.
Combine Solar With Alternative Charging Sources
Solar power works wonderfully for independent travel, but having a backup charging strategy is sensible.
A properly specified DC-DC charger can use energy from the vehicle’s alternator while driving, within the charging and electrical limits of the vehicle and battery system.
Shore-power charging offers another option when you occasionally stay at powered campsites.
These charging sources should use compatible equipment and follow the battery manufacturer’s charging requirements.
It’s also worth reducing unnecessary consumption. Efficient refrigeration, LED lighting, sensible inverter usage, and turning off idle equipment can sometimes extend your off-grid endurance more effectively than adding another panel.
The objective isn’t always generating the most electricity possible. It’s creating a system that reliably produces enough useful energy for the way you actually travel.
Designing high-output solar arrays for off-grid adventure vans is about more than installing powerful panels. It’s about matching electricity generation, battery storage, charging equipment, and everyday energy demands into one reliable system.
Start with an accurate power audit, evaluate your available roof space, and select components that work safely together. Pay particular attention to MPPT compatibility, wiring protection, mounting durability, and realistic expectations about solar production.
A well-engineered installation should make your travels simpler, not introduce another collection of problems to worry about.
Before purchasing your next solar upgrade, review your daily energy usage and sketch out your complete electrical design.
With the right preparation, your adventure van can become a comfortable, energy-independent base for exploring places far beyond the nearest electrical hookup.
